Image may be NSFW.
Clik here to view.
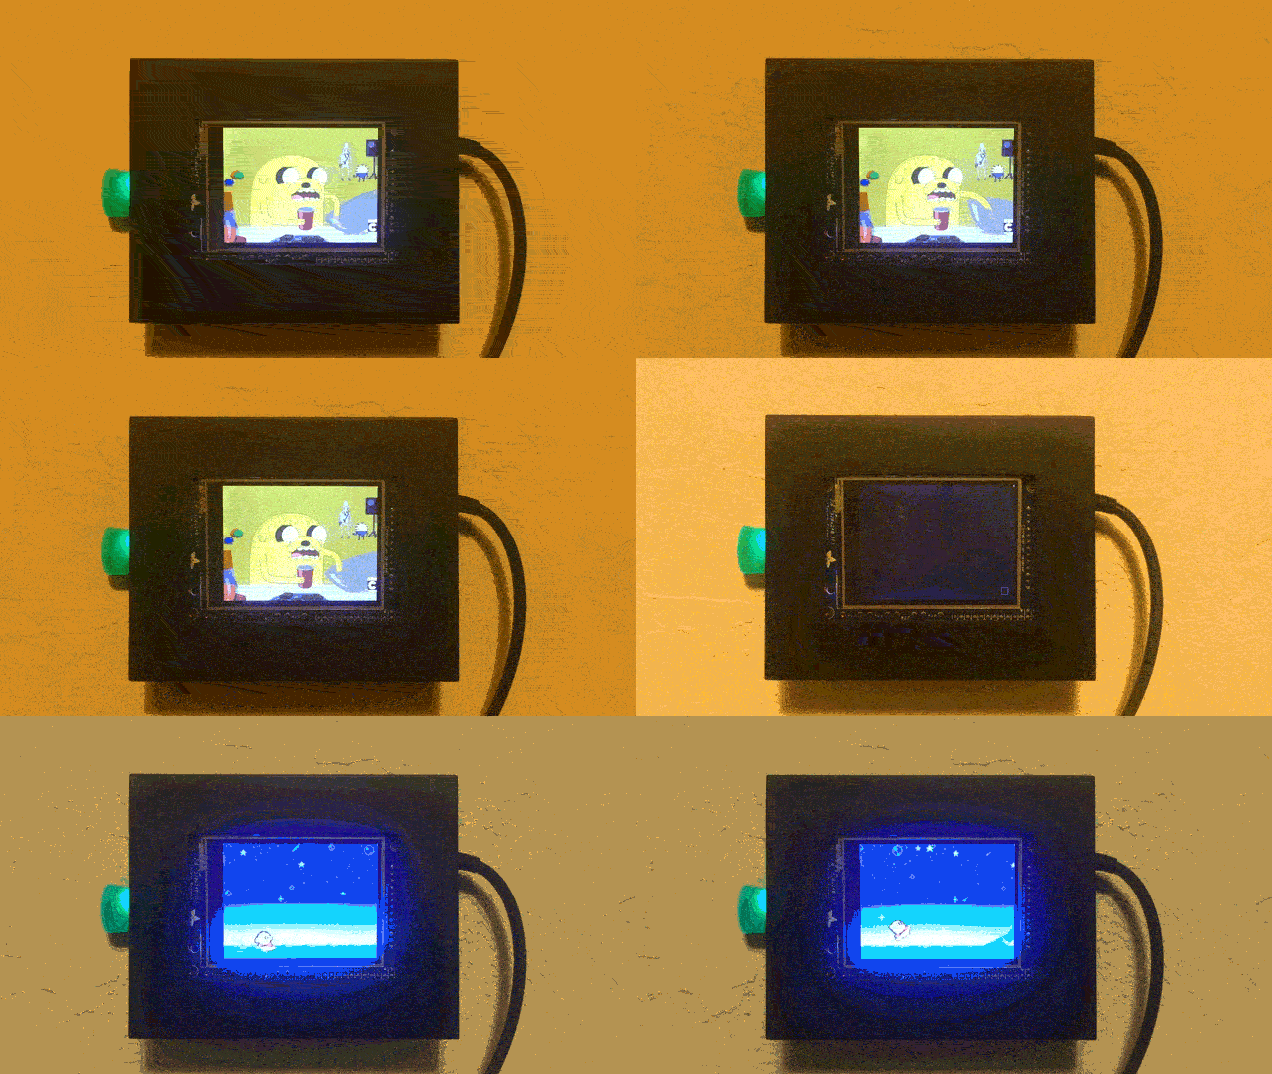
The Raspberry Pi is great for all kinds of interesting and complex projects. It’s also great for stupid projects, like this animated GIF photo frame I made this week. Here’s how to make one for yourself.
What You’ll Need
This project doesn’t need too much, but you’ll need a bit more than just a Raspberry Pi to get it working
- Raspberry Pi Model B or B+ (The 256MB in the A just doesn’t cut it)
- PiTFT display (any display will work, this one’s just cheap and small)
- USB keyboard (temporarily, I went with a mini wireless keyboard so I can easily change the URL of the GIFs whenever I want)
- SD Card
- Wi-Fi adapter
- Power adapter (you could also get a battery pack if you don’t want an ugly cord hanging off on your wall)
- Picture hanging strips (if you want to mount it to a wall)
- A cheap photo frame
What You’ll Get
Once you finish with this project, you’ll have a Raspberry Pi mounted to your wall with a photo frame around it that displays a new random GIF every few seconds. It’s incredibly goofy, but surprisingly awesome at the same time.
Step 1: Install Raspbian
First things first, you’ll need to install and set up Raspbian. If you’re using the PiTFT display I did, it’s a heck of lot easier to set up with their custom Raspbian image. You’ll install it on your SD card the same way as usual with Raspbian, but the operating system will already be configured for the display. You can follow our guide here
During first boot, you might also want to overclocking your Pi to at least 900MHz
Step 2: Hook Up Your Display
Image may be NSFW.
Clik here to view.
I went the extremely lazy route and bought the PiTFT that’s already soldered and ready to go. So, all you need to do here is click the display into the GPIO on your Raspberry Pi.
When it’s hooked up, go ahead and boot up Raspbian. You’ll be asked to calibrate the touch screen. Follow the on-screen directions and you’re all set.
Step 3: Install Chromium
Image may be NSFW.
Clik here to view.
In order for this to work, you’ll need a web browser that has a full-screen mode. Chromium’s kiosk mode
sudo apt-get install chromium
Once it’s finished downloading you can take your GIF machine for a test spin. I’m using Giphy TV to supply the GIFs. Type in:
chromium --kiosk tv.giphy.com/giphytrending
Chromium should now launch with some full-screen GIFs. You can change the /giphytrending part of the URL to whatever search string Giphy supports, like /science, /adhd, or /cat
When you’ve verified it works, tap Ctrl+F4 to exit kiosk mode and head back to the command line.
Step 4: Stop the Screensaver and Power Saving Features
Image may be NSFW.
Clik here to view.
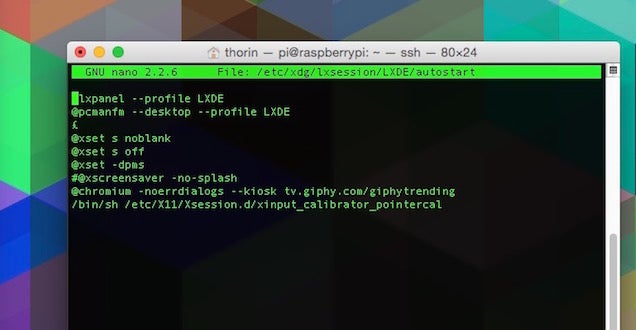
Your sweet little GIF photo frame is up and running, but unfortunately after about 10 minutes the screen will dim and you won’t see those fabulous GIFs. Next up, you need to disable any power saving features on your Raspberry Pi. From the command line, type in:
sudo nano /etc/xdg/lxsession/LXDE/autostart
This loads up the text editor. You’ll do a couple things in here. First, comment out the @screensaver -no-splash line by adding a # before it so it looks like this:
# @xscreensaver -no-splash
Then, add these lines below that:
@xset s off
@xset -dpms
@xset s noblank
While you’re in there, you might as well get Chromium to launch on boot in case you accidentally unplug your Raspberry Pi. Add in this line, inserting whatever Giphy URL you want:
@chromium --noerrdialogs --kiosk tv.giphy.com/giphytrending
With that, your Pi will boot right up into GIF mode.
Step 5 (Optional): Mount it to a Wall
Finally, you’ll just need to mount your Raspberry Pi to a wall and stick a frame around it. I used a couple command picture hanging strips like this so I can easily remove the Pi from the wall when I need to. Then, I went and grabbed a cheap wallet-photo sized photo frame from Walgreens, cut out some spaces for the Pi’s parts to stick out of, and taped it all together with electrical tape. I like that the electronics are still visible, but you can cover them up with a mat if you prefer.
Image may be NSFW.
Clik here to view.
The post Make an Animated GIF Photo Frame with a Raspberry Pi appeared first on Binary Reveux.